Bokashi Composting Basics
Bokashi…
Composting made easy.
*Hello all, Rachel here. I really hope you enjoy this blog written by my dear friend Melanie. Mel is an herbal goddess. She possess so much knowledge about plants, our bodies, this earth & how it can all work in harmony.
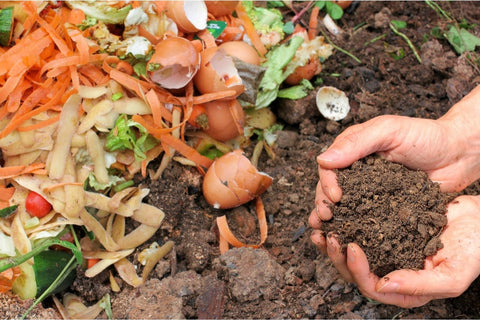
What is Compost?
Compost is a combination of plant matter, food waste, and recyclable materials. When these ingredients break down over time you are left with a nutrient rich substance that both fertilizes and improves your soil.
Types of composting
There are many ways to compost but to cover the basics let’s review Aerobic (with air), Anaerobic (without air) and Vermicomposting.
Aerobic: When you visualize composting I’m sure the first thing that comes to mind are the examples you see most often. Somebody who has dedicated their life to composting and has several composting bins. These bins get added to, turned, cared for and cured over the course of 1-2 years. This method is usually the reason most people stop before they start with composting. Compost piles just seem a bit intimidating, at least in my experience. For the sake of this blog post, let’s label this method intermediate to advanced AND worth looking into in the future!
Anaerobic: We will revisit this word later but for now let’s think of a version of composting that is done without air, what probably comes to mind is a landfill. Landfills come with a negative connotation as often they are the source of methane gases released into the atmosphere and contributing to global warming. Tossing your food waste into the trash is the easiest choice, but at what cost? Let’s label this method as easy and unnecessary.
Vermicomposting: Some would place vermicomposting into the category of aerobic because air is introduced into the breakdown process. However, I believe this form of composting deserves its own category as we are calling on the help of worms to help break down all the organic material much quicker. Worms also produce what some backyard enthusiasts refer to as black gold or worm castings. When finished this is a supremely sought-after form of compost. The one downside is that you are dealing with worms so let’s call this form of composting easy, but for some a little queasy.
This brings me to the champion of all composting forms, Bokashi! Bokashi can spend time in all three categories listed above and yet deserves a category all its own. Bokashi lends the quickest finished product, requires little to no experience, and can be started right in your kitchen this week. Are you sold yet?
So what is Bokashi anyway?
Bokashi is considered a pre-compost in nature. Bokashi is the process of fermenting food scraps vs. allowing them to decompose. The food scraps are essentially pickled in an (anaerobic) environment. Liquid is filtered off to use as a foliar spray and soil fertilizer. Once fermented the scraps are then added into your garden beds/soil station (aerobic) or worm bin (vermicomposting) to further breakdown into their final composted state in a matter of just a few weeks.

Why Bokashi?
Bokashi is great for small space living both in and outdoor which makes it accessible for a lot more people. The process is very beginner friendly and not time consuming, which is great for all of us with busy schedules. Bokashi allows for a wide range of additions that often are discouraged from composting such as dairy, bones and meat scraps. This form of composting is much quicker and efficient than other forms. As a bonus Bokashi provides free fertilizer for both your indoor and outdoor plants in the form of liquid extracted from the bottom of your bin.
What do you need to get started?
All you need to get started is a Bokashi bucket and bran. The bran used in the process of Bokashi has been inoculated with beneficial microbes that help bacteria to flourish and ferment your food scraps instead of allowing them to decompose.

How to use a Bokashi System?
- Place the grate provided inside your bucket on the ledge near the bottom. Run water through the drain to make sure there aren’t any clogs in the system.
- Close the drain valve completely. This is where you will drain the Bokashi liquid gold later.
- Add your food scraps and cover with a thin layer of bran. Use a sizable piece of cardboard or plastic to press out all the air pockets. You can leave this piece in the bucket and on top of your scraps to further prevent air flow.
- Continue to layer your scraps and bran until you fill your bucket all the way up.
- Drain off any liquid that collects in the bottom of your bucket. Depending on the scraps you add there could be more or less liquid at the bottom. If you aren’t producing any liquid at first, don’t be concerned. Pour off liquid every 4-8 days. You can save this liquid in a dark glass container in the fridge, dilute 1 part liquid to 100 parts water to use as a fertilizer for indoor/outdoor plants or you can dump down the drain to keep your pipes clean and clear.
- ** If you notice a white mold growing on top of your scraps as you are adding in more layers, don’t panic! This is actually a fantastic sign that your Bokashi is working just as it should be!
- Once your bin is full, allow it to sit and further ferment for 2 weeks.
- This is the step where you now have a few options of what to do next.
- You can mix your now fermented food scraps with compost or garden soil in a closed container to decompose over the course of 4-6 weeks. At this point you can pour the now mostly composted scraps right onto your garden bed. If there are still food scraps left, simply push them down into the soil and your soils micro-organisms will do the rest.
- You can dig a large trench (double the height and width of your buckets) in your garden to pour fermented scraps into. The scraps are initially acidic so you do not want plant roots to come into contact with Bokashi for 4-6 weeks. At this point you can plant right into the soil and your plants roots will soak up the nutrients from the scraps for the rest of the season. The only downside to this method is that you will be disturbing the soil life. If you follow a no-dig method in your garden, it is best to choose one of the other options.
- If you have introduced the liquid gold into a worm bin, you can slowly add scraps from Bokashi into the bin. Your worms will eventually grow accustomed to the acidic nature of the Bokashi and with time can handle more and more of the scraps.
- If you have an aerobic composting method already set up, Bokashi is a great addition to any bin as the scraps are filled with beneficial bacteria and microbes that will heat any pile up very quickly. This in turn will speed up the process, but we will save this info for another post.
- Wash out your Bokashi bin thoroughly with soap and vinegar. You are ready to begin again!
Pro vs Con list
Pro's
- Easy to set up
- Can be done indoors
- Can use dairy, meat and bones unlike some other systems
- Compost can be created in as little as 8 weeks (2 weeks to fill, 2 weeks to ferment, 4 weeks to breakdown)
- Great addition to a hot composting bin
- Low carbon dioxide emissions
- Free fertilizer
Con’s
- You may need multiple buckets. Bokashi needs to ferment for 2 weeks before being dumped and unless you have another composting system, you would just have to dump food scraps until it is cleaned and ready again.
- The ongoing cost of buying bran
Final Thoughts
Composting is a system that can feel like a huge task to take on. With so many methods and options, it may just have you feeling like you aren’t ready to start. This is one reason I speak so highly of Bokashi as it lends a hand to beginners. It’s a very easy and cost-efficient way to step into the world of composting. In very little time, you are rewarded with supreme soil that can grow some of the most beautiful plants you’ve ever seen. With Bokashi, composting feels like an extension of your kitchen and its truly accessible to almost anyone.
Written by: Melanie Coons
IG: _Thebloomingseed_